

Under Vehicle Inspection System: How It Works, What It Catches, and Why It Matters for Airbag & Seat Belt Verification
On a lot of collision and salvage vehicles in the DFW area, the most serious crash clues are not on the hood or doors – they are hidden underneath. A modern under vehicle inspection system (UVI) helps shops document the undercarriage, spot red flags fast, and decide when deeper safety checks like Vehicle Diagnostic, SRS Airbag Module Reset, or Seat Belt Replacement are needed.
As an auto safety-focused shop serving Little Elm TX and the greater DFW metroplex, we use underbody information to support rebuilt vehicle verification, salvage workflows, and post-collision restraint system checks on primarily American and Japanese vehicles.
Below is a practical, shop-focused guide to how these systems work, what they catch, and how to plug them into a safe workflow for airbags, seat belts, and modules.
What Is an Under Vehicle Inspection System?
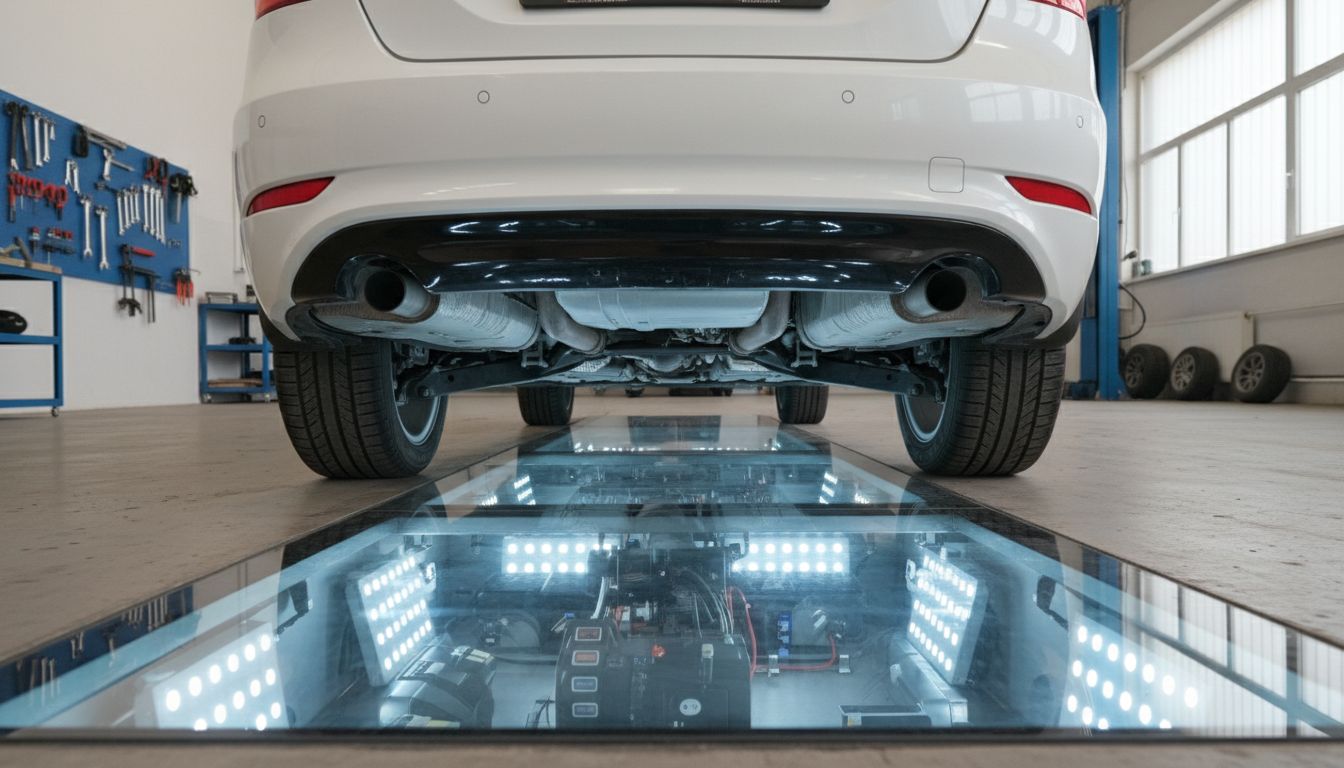
A under vehicle inspection system is a set of low-mounted cameras, specialized lighting, and software designed to capture clear images of the entire undercarriage as the vehicle drives over or past the scanner.
You may also hear it called an under-vehicle scanner, undercarriage imaging system, or part of an automatic vehicle inspection system. In security settings (border crossings, military bases) these tools look for contraband or tampering. In our auto safety world in Little Elm TX and DFW, we use the same core technology to:
- Document underbody condition before and after repairs
- Reveal collision evidence that isn’t obvious from exterior panels
- Support honest, complete salvage inspection and rebuilt vehicle verification
- Flag areas where the crash may have affected SRS airbags, seat belt pre-tensioners, or other safety modules
The key value is consistency. Every vehicle gets a repeatable, full-length underbody scan that technicians and inspectors can review, mark up, and save to the file.
How an Under Vehicle Inspection System Works Step by Step
Most shop-friendly systems follow the same basic process. Here’s how it fits into a real workflow.
Cameras, lighting, and image capture under the vehicle
The hardware is mounted in a pit, ramp, or low-profile housing. As the vehicle moves slowly over the system:
- Multiple high-resolution cameras capture overlapping shots of the undercarriage
- LED lighting removes heavy shadows and highlights edges, leaks, and damaged surfaces
- The system times exposures to minimize motion blur, so even daily-driver trucks and SUVs look crisp underneath
For American and Japanese vehicles common in DFW (Chevrolet, Ford, Toyota, Honda, Nissan, etc.), the system quickly shows:
- Frame rails, subframes, and crossmembers
- Exhaust routing and heat shields
- Pinch welds, jacking points, and rocker areas
- Fuel and brake lines, tanks, and common leak points
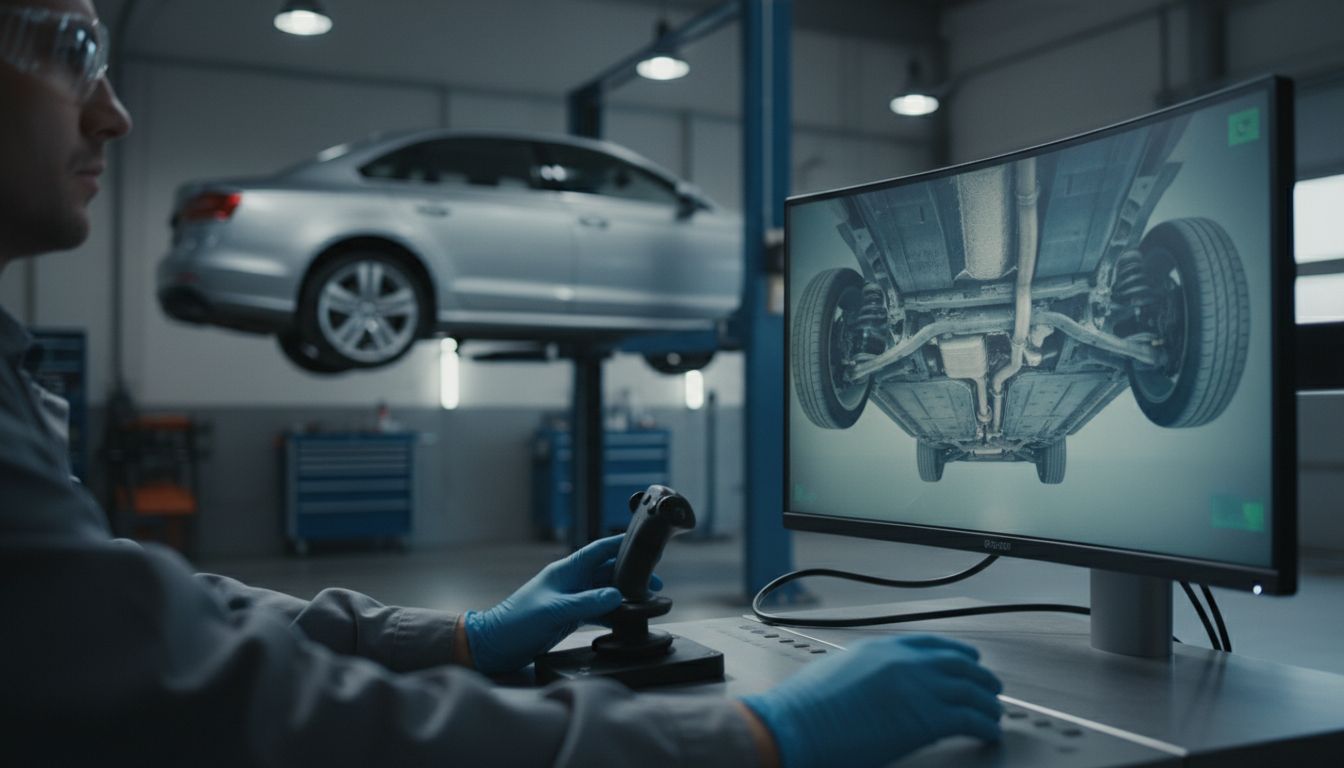
Software stitching, baseline comparison, and anomaly review
Next, the software assembles individual images into a continuous undercarriage view:
- Frames are stitched into a single scrollable image or image set
- The system may highlight sharp changes in geometry (bent brackets, crushed areas)
- Some platforms can compare to a baseline image from a previous visit or a reference model to flag new anomalies
The technician or inspector then reviews the images on a monitor, zooming into anything that looks like impact, corrosion, or non-factory modification.
How an automatic vehicle inspection system speeds up repeatable inspections
When the undercarriage scanner is integrated into a broader automatic vehicle inspection system (AVI):
- Each scan is automatically tagged to the VIN
- Findings can be added to a digital inspection report alongside top-side photos
- Flags can trigger follow-up steps like Vehicle Diagnostic or restraint checks
This matters for salvage inspection and high-volume collision work in DFW. Instead of relying only on a hurried look from the lift, a consistent underbody image is captured every time, even when the bay schedule is tight.
What technicians and inspectors should document during review
To get value from the system, the shop has to document what it sees. We recommend noting:
- Crushed or distorted frame sections, crossmembers, or pinch welds
- Fresh scrapes or gouges on suspension, exhaust, or fuel tank shields
- Evidence of prior repair – welds, plates, or non-OEM hardware
- Fluid traces and residue patterns suggesting an ongoing leak
- Missing shields, underbody covers, or brackets
All of this becomes part of the repair and verification story, especially when airbags or seat belts may have deployed or locked during the original incident.
What Defects and Red Flags Can an Under Vehicle Inspection System Catch?
A good underbody scan will not fix anything, but it will show you where to look closer. Common issues we see in the DFW area include:
Impact damage, crushed pinch welds, bent brackets, and underbody scraping
An under vehicle inspection system is excellent at exposing impact points:
- Crushed pinch welds from improper jacking or bottoming out
- Flattened or twisted brackets near the front or rear crush zones
- Deep scrapes or gouges across crossmembers or floor pans
- Off-road damage on trucks and SUVs that never shows in the sales photos
These are often the physical signatures of a crash or a secondary impact (curb hit, underride), even if the exterior panels have been replaced.
Fluid leaks, missing shields, loose fasteners, and corrosion
Lighting and high-resolution cameras make subtle issues easier to catch:
- Oil, coolant, or transmission fluid trails tracking along the underbody
- Rust streaks or bubbling at stress points
- Missing splash shields and undertrays that should be present on many modern American and Japanese vehicles
- Loose or missing fasteners holding fuel tanks, exhaust components, or lines
On a salvage vehicle, these clues can reveal short-cut repairs or neglected damage that might affect long-term safety.
Signs of prior collision or salvage repair underneath the vehicle
Undercarriage imaging is especially valuable when the title history shows salvage or rebuild activity:
- Non-factory welds, plates, or reinforcement on frame rails
- Cut-and-welded sections not consistent with OEM construction
- Mixed-use of aftermarket hardware in critical mounting locations
- Burn marks or grinding patterns that indicate past straightening
These don’t automatically make a vehicle unsafe, but they demand more careful verification of restraints and modules.
Evidence that can trigger deeper Vehicle Diagnostic or restraint-system checks
When the underbody scan shows significant impact or structural changes near crash zones, that’s a strong cue to:
- Perform a full Vehicle Diagnostic scan for diagnostic trouble codes (DTCs)
- Check for crash data stored in the airbag module
- Verify seat belt pre-tensioner status (locked, deployed, or previously tampered)
- Plan for possible SRS Airbag Module Reset, Airbag Module Programming, or Seat Belt Replacement / Pre-Tensioner Replacement
Detail how under-vehicle inspection systems function, what defects they catch, integration with salvage inspections, and tips for shops using them during airbag/seat belt verification.
For DFW collision and salvage rebuild shops, the goal isn’t to own fancy scanners—it’s to build a repeatable process that protects your customer, your license, and your liability. Here’s how to plug a UVI into that process.
Using UVI images during salvage and rebuilt inspection documentation
On a salvage or rebuilt American or Japanese vehicle coming through Little Elm TX or the surrounding cities, a consistent practice might look like:
- Capture a pre-repair underbody scan as part of intake.
- Save images with the VIN (you can confirm build details with a VIN lookup at the LockNCal VIN decoder).
- Mark key areas: impact points, prior repairs, heavy corrosion, or missing components.
- Attach underbody images to your salvage/rebuild documentation package.
- Capture a post-repair underbody scan for your final file.
This documentation not only supports transparency with buyers but also guides your own restraint-system verification plan.
Connecting underbody findings to SRS checks, module scans, and seat belt verification
Once you see underbody impact near the front or side crash zones, you should assume SRS and restraint components may have been involved, even if the cluster lights are currently off.
- Run a Vehicle Diagnostic scan to check for SRS and restraint DTCs
- Check whether the airbag module still holds crash data or has been replaced
- Inspect belts and seat belt pre-tensioners for locked mechanism, webbing damage, or tampering
- Plan for SRS Airbag Module Reset or Airbag Module Programming if applicable
Underbody clues tell you where to look harder. Electronics and physical restraint checks confirm how safe the vehicle really is.
Shop tips for documenting pre- and post-repair condition
To outperform shops that only do a quick flashlight check, we recommend:
- Using consistent angles and naming for image files per vehicle
- Noting “no change” on known-good areas after repair to show they were rechecked
- Adding notes on underbody images that correlate with module scan results or restraint work performed
- Keeping image and report backups for your own liability protection
When underbody anomalies suggest the need for Seat Belt Replacement, Pre-Tensioner Replacement, or SRS Airbag Module Reset
Underbody signs that often lead to restraint work include:
- Severe impact around front frame horns or lower radiator support
- Side or under-ride damage near B-pillars or rocker panels
- Evidence of a previous crash not fully disclosed in documentation
These conditions should trigger:
- Vehicle Diagnostic scan for SRS codes
- Physical inspection of belts and seat belt pre-tensioners
- Evaluation for Seat Belt Replacement and/or Pre-Tensioner Replacement
- Possible SRS Airbag Module Reset or Mail-In Airbag Module Reset if the module is locked with crash data but otherwise healthy
Where localized workflows like airbag system verification atlanta differ from Texas inspection practices, and what remains universally important
Shops sometimes search phrases like airbag system verification atlanta when researching best practices from other markets. While Georgia and Texas differ in inspection rules and local expectations, a few principles are universal:
- Underbody evidence must be taken seriously, especially around crash zones.
- Electronic scans (modules and DTCs) and physical restraint checks go hand-in-hand.
- DIY airbag or seat belt work is unsafe because of explosive SRS components.
- Full verification usually requires professional tools and procedures, whether you’re in Atlanta, Little Elm TX, or anywhere else.
When Underbody Findings Point to Airbag and Seat Belt Safety Problems
The undercarriage doesn’t show you an airbag or a seat belt directly—but it does tell you how hard and where the vehicle was hit. That’s critical for deciding how deep your restraint verification needs to go.
Hidden crash indicators that may not show on exterior panels
Some of the most important crash indicators are only visible underneath:
- Buckled frame sections near mounting points for seat structures or restraint sensors
- Crushed brackets at front end or along the rockers indicating an underride event
- Unibody kinks near areas where side curtain airbags and seat belt pre-tensioners would deploy
These findings should never be ignored just because exterior panels were replaced and repainted.
Why deployed or locked restraints need verified correction
Any time a vehicle has taken a substantial hit, you must verify that:
- All deployed airbags were replaced correctly
- All locked or deployed pre-tensioners were replaced, not bypassed
- Any used or aftermarket restraint parts were installed properly and safely
On American and Japanese vehicles, it is common to find reused belts or “repaired” pre-tensioners in the salvage world. That is a serious safety risk.
Why warning lights alone are not enough without a full Vehicle Diagnostic
A “no airbag light” condition does not guarantee a safe system:
- Bulbs or LEDs can be removed or taped over
- Clusters can be swapped
- Some stored crash data or history codes may not light the warning lamp immediately
That’s why we emphasize a full Vehicle Diagnostic on post-collision and salvage units, paired with underbody findings and physical restraint inspection.
When Airbag Module Programming or Module Programming may be part of the process
If the vehicle has a new or replacement SRS module, or if the module has been wiped or reset, you may need:
- Airbag Module Programming to match the unit to the specific vehicle and configuration
- Broader Module Programming to ensure all related systems communicate correctly
This step is essential for many late-model American and Japanese vehicles where SRS modules communicate with ADAS, ABS, and powertrain modules.
Troubleshooting Workflow for Shops After a UVI Scan
Here is a straightforward troubleshooting path that ties the under vehicle inspection system into your restraint verification process.
Start with visual evidence and scan data
After you capture the underbody images:
- Review and mark all obvious impact and anomaly areas
- Compare to any previous scans, if available
- Note which zones overlap with sensor locations, restraint mounting points, or wiring runs
Confirm DTCs with Vehicle Diagnostic
Next, connect a professional scan tool and run a full Vehicle Diagnostic on all modules, with special attention to:
- SRS / Airbag module
- ABS / Stability (since they often share crash sensors or data)
- Body and chassis modules that interact with restraint logic
Record all diagnostic trouble codes, including history and pending codes.
Check restraint history, crash data, and module status
With DTCs in hand:
- Determine whether the airbag module still has crash data stored
- Verify whether the module has been replaced or tampered with
- Check all belts and seat belt pre-tensioners for locking, abnormal feel, or visible damage
Verify whether the vehicle needs SRS Airbag Module Reset or Mail-In Airbag Module Reset
If the module is structurally sound but locked with crash data, you may not need a new unit. Options include:
- SRS Airbag Module Reset on-vehicle for DFW / Little Elm TX shops and owners
- Mail-In Airbag Module Reset if you’re outside our service area but want a reset performed by a safety-focused specialist
In both cases, the goal is the same: remove crash data correctly, confirm the hardware is still healthy, and then verify proper operation with a follow-up scan.
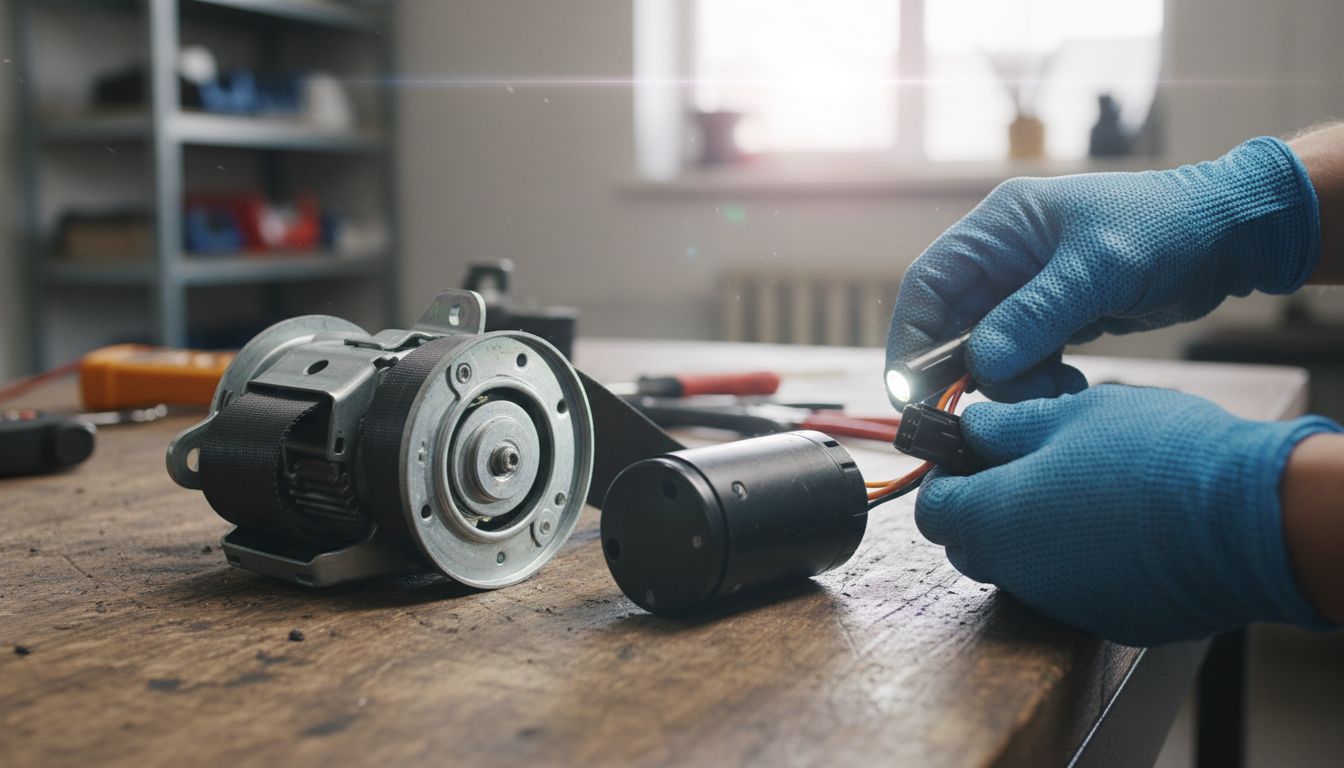
Confirm if seat belts or pre-tensioners require Replacement rather than reuse
Never reuse a belt or seat belt pre-tensioner that has deployed or locked. After correlating UVI findings and scan data, determine whether the vehicle needs:
- Seat Belt Replacement for damaged or locked belts
- Pre-Tensioner Replacement for deployed or tampered units
All replacements should be verified with another Vehicle Diagnostic and visual check before delivering the vehicle.
DIY Risks: Why Underbody Clues Should Not Lead to Guesswork on SRS Repairs
It is normal for safety-conscious owners to crawl under a vehicle with a flashlight or phone camera. That’s fine for general awareness, but it’s dangerous when it turns into DIY restraint work.
Safety warning: airbags and pre-tensioners contain explosive components
SRS airbags and seat belt pre-tensioners contain explosive devices/components. They are designed to ignite or rapidly actuate during a crash. Mishandling them can cause:
- Serious injury from unexpected deployment
- Burns, lacerations, and hearing damage
- Unseen damage that leaves the system unreliable in the next crash
Risks of disconnecting, probing, or reinstalling restraint parts incorrectly
Common DIY mistakes include:
- Probing SRS connectors with test lights or multimeters
- Swapping in junkyard belts or modules “because the connectors match”
- Reinstalling seat belt pre-tensioners without proper torque and alignment
- Clearing codes without understanding what triggered them
Any of these can disable the system or cause a delayed failure when you need it most.
Why salvage vehicles need documented, professional verification
Salvage and rebuilt vehicles in DFW often have a complicated past. Underbody scans and history checks help, but:
- You still need professional Vehicle Diagnostic support
- SRS Airbag Module Reset, Seat Belt Replacement, and Pre-Tensioner Replacement must be done with proper procedures
- ADAS Calibration may be necessary when sensors, cameras, or radars were disturbed in the crash or during repair (learn more about what ADAS calibration is)
DIY guesses are not enough when explosive devices and life-critical systems are involved.
Best Practices for Shops in Little Elm TX Handling UVI, Salvage Checks, and Safety Verification
For shops in Little Elm TX and nearby communities like Frisco, The Colony, and Denton, integrating underbody imaging into a safety-first workflow is straightforward.
Build a repeatable intake checklist
Create a standard intake routine for collision and salvage units:
- Capture pre-repair underbody scan
- Run a baseline Vehicle Diagnostic scan
- Decode the VIN for build and safety options using the LockNCal VIN decoder
- Note all underbody issues that overlap with restraint or sensor systems
Save underbody images before teardown and after repair
For your records and customer transparency, keep both:
- Before images showing original salvage or collision condition
- After images showing the completed undercarriage state
This protects you if questions arise later about whether something was missed or if new damage was done after delivery.
Pair UVI findings with Vehicle Diagnostic and final verification steps
The shop that beats generic competitors is the one that treats underbody evidence as the starting point, not the end:
- Use UVI images to decide where further inspection is needed
- Combine images with Vehicle Diagnostic, restraint inspection, and – when needed – ADAS Calibration
- Remember that post-hail damage repairs may require ADAS recalibration too; hidden issues are not just a collision problem
Focus on American & Japanese vehicle workflows we support
Our local workflows and tools at LockNCal are optimized for American and Japanese vehicles common in the DFW area. That includes typical truck platforms, sedans, and crossovers from major domestic and Japanese brands. If you’re not sure how underbody findings should influence your restraint verification on a particular model, reach out and we can help you design a safe plan.
How LockNCal Helps with Post-Collision Safety Verification
LockNCal in Little Elm TX focuses on the safety systems that many body and mechanical shops don’t have the time, tools, or training to handle in-house. When your under vehicle inspection system or manual undercarriage inspection reveals crash clues, we can help with the next steps.
Vehicle Diagnostic for warning lights, crash codes, and restraint faults
We provide Vehicle Diagnostic support to:
- Scan all modules for diagnostic trouble codes
- Identify SRS, restraint, and ADAS faults
- Confirm whether crash data or configuration issues are present
SRS Airbag Module Reset and Mail-In Airbag Module Reset options
Depending on your location and module condition, we offer:
- SRS Airbag Module Reset for local DFW / Little Elm TX vehicles
- Mail-In Airbag Module Reset for shops and owners outside our immediate service area who want safety-focused reset work done off-vehicle
Seat Belt Replacement and Pre-Tensioner Replacement
When underbody and diagnostic findings show that restraints have locked or deployed, we handle:
- Seat Belt Replacement using proper procedures
- Pre-Tensioner Replacement to restore full restraint function
This is critical on any vehicle with crash history, especially salvage and rebuilt titles.
ADAS Calibration when collision or salvage work affects safety systems
Underbody damage often goes hand-in-hand with front-end, side, or structural work that can disturb cameras, radars, and sensors. In those cases, we provide ADAS Calibration services to bring systems like lane-keep assist and collision avoidance back into spec. If you need a deeper dive, see our guide on what ADAS calibration is and how it protects drivers.
For a broader look at hidden safety issues that DFW drivers often overlook, you can also review vehicle safety system damage most Little Elm drivers miss.
If you are in Little Elm TX or the surrounding DFW cities we serve and your shop uses an under vehicle inspection system – or even just careful undercarriage inspection – LockNCal can handle the restraint, module, and ADAS side so you can focus on body and mechanical work. For our full Little Elm TX service coverage, visit our Little Elm TX service page.
FAQs
1. What is an under vehicle inspection system?
An under vehicle inspection system uses cameras, lighting, and software to capture clear images of the entire undercarriage as a vehicle passes over the scanner. In DFW safety and collision work, it’s used to document underbody condition, identify crash indicators, and support salvage and rebuilt vehicle verification—not just security screening.
2. How does an automatic vehicle inspection system differ from a manual underbody check?
A manual underbody check depends on a technician’s position, lighting, and time. An automatic vehicle inspection system captures consistent, high-resolution images every time, tags them to the VIN, and lets you compare before/after conditions. It doesn’t replace technician judgment, but it gives you better, repeatable data to work from.
3. What problems can an under vehicle inspection system reveal after a collision or on a salvage vehicle?
Common findings include crushed pinch welds, bent brackets, scrapes from bottoming out, fluid leaks, missing shields, corrosion, and evidence of prior underbody repairs. On salvage and rebuilt vehicles, these clues often reveal how severe the crash really was and whether repairs were done correctly underneath.
4. Can an underbody scan confirm whether airbags or seat belts are safe?
No. An underbody scan can reveal clues – such as impact severity and location – and help decide where to investigate further. But final determination of airbag and seat belt safety usually requires a full Vehicle Diagnostic, physical restraint inspection, and, when needed, SRS Airbag Module Reset, Seat Belt Replacement, or Pre-Tensioner Replacement.
5. Why is DIY airbag or seat belt verification risky?
SRS airbags and seat belt pre-tensioners contain explosive components. DIY verification can lead to accidental deployment, injury, and hidden damage to wiring or modules. Even if you spot underbody crash clues yourself, the actual diagnosis and correction of SRS, seat belts, and pre-tensioners should be handled by trained professionals with the right tools.
6. Do I need ADAS calibration after collision-related underbody damage?
You might. If the same incident that caused underbody damage also involved front-end, side, or structural repairs, there’s a good chance ADAS sensors and cameras were disturbed. In those cases, ADAS Calibration is important to restore lane-keep, collision avoidance, and similar systems. We explain more in our article on what ADAS calibration is.
7. Do you offer airbag module reset by mail if I’m outside DFW?
Yes. If you’re outside our DFW service area but want a safety-focused reset, we offer Mail-In Airbag Module Reset. You send us the module, we perform the reset and verification procedures off-vehicle, and then you or your local shop handle reinstallation and final scans.
If you’re in Little Elm TX or any of the surrounding DFW cities we serve and your underbody inspection has raised questions about restraint or module safety, LockNCal is here to help with Vehicle Diagnostic, SRS Airbag Module Reset, Mail-In Airbag Module Reset, Seat Belt Replacement, Pre-Tensioner Replacement, Module Programming, Airbag Module Programming, and ADAS Calibration support. Learn more about our local services at our Little Elm TX service page.


